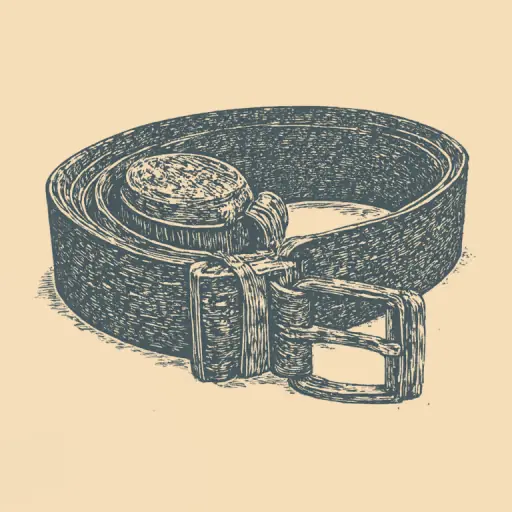
How to wear a tactical belt: adjustment and gear distribution guide
- 14 min read
- 64
Tactical belts have long moved beyond purely military gear. Today, they are a basic piece of equipment for security personnel, shooters, hunters, and EDC (everyday carry) enthusiasts. Unlike a classic trouser belt, its main function is to serve as a reliable carrying platform for holsters, pouches, and other heavy gear.
An improperly adjusted belt turns carrying gear into torture: it sags, slips during dynamic movement, and overloads the lower back, causing rapid fatigue. For the belt to work effectively, it is important to consider its rigidity, buckle type, and anatomically correct fit.
In this practical guide, we will detail how to correctly choose, adjust, and wear a tactical belt—from rigid double-belt systems (inner/outer belt) for the range to concealed EDC models under regular jeans.
Choosing the Right Type of Tactical Belt for Your Tasks
Before delving into the subtleties of adjustment and pouch distribution, you must determine the foundation. A tactical belt is not just a utilitarian accessory holding up trousers; it is the foundation of your entire loadout. Its rigidity, width, and construction depend directly on the usage scenario: whether it's concealed weapon carry in the city, multi-hour training at the shooting range, or executing combat missions.
Choosing the wrong belt type will negate any attempts to distribute weight correctly. To avoid lower back pain and constant gear slippage, it is important to understand the key differences between existing form factors. Let's examine the main classes of tactical belts available on the market and determine which one will solve your specific needs.
Everyday EDC Belt vs. Combat Load-Bearing Belt (Valbelt)
The choice between an everyday EDC belt and a combat load-bearing belt (valbelt) depends on your tasks and the volume of gear you carry.
- EDC Belt (Everyday Carry) — This is a rigid trouser belt, usually 1.5 inches (3.8 cm) wide. Its main job is to hold up trousers and provide secure attachment for a concealed carry holster and a couple of light pouches. It is made from dense nylon webbing, often reinforced with a plastic insert for rigidity, and equipped with a compact buckle (e.g., a low-profile Cobra buckle). This belt is discreet under civilian clothing and easily integrates into a daily wardrobe.
- Combat Load-Bearing Belt (Valbelt) — This is a wide, anatomical external platform with a MOLLE interface. The valbelt is worn over clothing, not threaded through trouser loops. It is designed for heavy gear: multiple magazine pouches, an IFAK (Individual First Aid Kit), dump pouches, and a holster. Thanks to its soft padding and width, it effectively distributes weight, reducing strain on the lower back during active range use or combat situations.
Double-Belt Systems (Inner/Outer Belt) and Their Advantages
The double-belt system (inner/outer system) is a hybrid solution that combines the convenience of a trouser belt with the functionality of a load-bearing belt. The construction consists of two elements:
- Inner Belt: A thin nylon strap covered with Velcro. It is threaded through the trouser loops and functions as a standard EDC belt.
- Outer Belt: A rigid tactical belt with a MOLLE interface, onto which the holster and pouches are rigidly attached. It has a corresponding Velcro patch on the inside and fastens with a sturdy Cobra buckle.
Main system advantages:
- Quick Release: The outer load-bearing belt with all its gear can be removed or put on in seconds without taking the inner belt out of the trouser loops.
- Stability: Thanks to the Velcro grip around the entire waist circumference, the holster and pouches do not shift during running, jumping, or rapid weapon draws.
- Comfort: The rigidity of the outer belt distributes the gear's weight, preventing point pressure on the lower back.
Step-by-Step Sizing Adjustment and Wearing Rules
Even the most advanced and expensive tactical belt will be useless or, worse, hazardous if it is not fitted correctly to your body. Adjustment errors cause the holster and heavy pouches to shift while running, and excessive pressure on the lower back quickly leads to fatigue and nagging back pain.
Correct individual setup is always a compromise between secure gear retention and freedom of movement. For the belt to work as a single unit with your body, you must accurately determine its working length and find the optimal placement point on your body, taking into account anatomical features and the specifics of your gear.
How to Determine Optimal Length and Strap Tension
Correctly adjusting the length of a tactical belt always begins with trying it on over the layers of clothing you plan to wear. Sizing it on bare skin or thin underwear is a common mistake that results in the belt being too tight when heading out into the field.
Step-by-step length and tension adjustment algorithm:
- Prepare the base. Put on your tactical trousers. If you are using a double-belt system (inner/outer belt), firmly secure the inner belt in the trouser loops.
- Strap slack. Thread the outer nylon strap through the buckle (e.g., a sturdy metal Cobra buckle). The free tail of the belt must have at least a 10–15 cm reserve for quick adjustment when changing seasons, but it must not overlap the gear attachment zones.
- "Two-finger" test. Tighten the belt so that two fingers can barely, but firmly, pass between the strap and your body (at the level of the abdomen).
Remember: excessive tension turns the belt into a rigid corset, disrupts blood circulation, and causes lower back pain within a couple of hours of use. Insufficient tension will cause the heavy holster and pouches to swing, pull the belt down, and interfere with dynamic movement.
Correct Waist Height for Reducing Back Strain
The height at which the tactical belt is worn is a key factor determining whether your back will tire after two hours of carrying gear. The main anatomical mistake is wearing a heavily loaded load-bearing belt too low, on the hips like regular jeans, or too high, compressing the abdominal cavity.
To minimize strain on the lower back, follow the rule of weight distribution onto the pelvic bones:
- Anatomical reference: The belt should rest on the upper edge of the iliac crests. This is a rigid bony structure capable of bearing significant weight without harming the spine.
- Coordination with trousers: If you are using an inner/outer belt system, the inner belt in the trouser loops must sit exactly on this line. Do not allow the trousers to slip below the hips.
- Valbelt placement: The outer tactical belt is worn so that its centerline passes exactly over the iliac crests, and the back portion fits snugly against the sacrum.
Correct height placement transfers up to 70% of the weight of pouches and holsters onto the legs and pelvis, completely relieving the lumbar region of compressive load.
Ergonomics and Gear Distribution on the Belt
Proper belt fit and tension adjustment are only half the battle. Even the most advanced tactical belt will become a source of constant discomfort if the attached gear is distributed chaotically. The ergonomics of element placement determines not only the speed of your access to your weapon, magazines, or first aid kit, but also how evenly the load is distributed across the musculoskeletal system during intense movement.
To turn the belt into an effective tool, you must balance it by weight and divide the working space into intuitive zones. This will allow you to operate blindly, relying on muscle memory, minimizing strain on the lower back, and preventing the entire structure from twisting during running or bending.
Placement of Holsters and Pouches by Quick Access Zones
When distributing gear effectively on a tactical belt (web belt or rigid EDC belt), a clock-face scheme is used, with the buckle conceptually located at 12 o'clock.
- Zone 1: Lead Side (3–5 o'clock). This is where the pistol holster is placed. It must be rigidly secured so that the belt does not twist when drawing the weapon. Slightly further out (at 5 o'clock), you can attach a knife or a magazine dump pouch.
- Zone 2: Weak Side (7–9 o'clock). This is the quick reload zone. Pouches for pistol and rifle magazines are mounted here. Position them vertically, with the opening facing up.
- Zone 3: Rear (6 o'clock). The optimal place for a first aid kit (IFAK). Access to it must be possible with both the left and right hand.
- Zone 4: Front (11–1 o'clock). Keep this area clear so the belt does not impede bending. Only a compact tourniquet is allowed in this area.
Using a MOLLE interface will prevent elements from shifting during active movement.
Weight Balancing to Prevent Lower Back Pain
Uneven weight distribution is the main cause of rapid fatigue and chronic lower back pain. When the right hip is overloaded with a heavy holster while the left remains empty, the spine compensates for this imbalance with lateral curvature. After a few hours of active movement, this will inevitably lead to muscle spasms.
To avoid back problems, observe three golden rules of balancing:
- Counterweight Principle. Balance heavy gear on opposite sides. If a holster is on the right, magazine pouches, a multi-tool, or a flashlight should be on the left. Strive for a weight ratio between the left and right sides close to 50/50.
- Spinal Decompression. Never place rigid, heavy, or angular items directly on the sacrum and lumbar region. Falling onto your back in this area can cause injury. Only soft items, such as an IFAK in a flat pouch, are allowed in this zone.
- Closeness to Center of Gravity. Place the heaviest gear closer to the hips (over the hip joints). This transfers the load to the pelvic bones and large leg muscles, completely relieving the lower back.
Proper balance is checked simply: put on the loaded belt and close your eyes. If you lean to one side, reconfigure the pouches.
Features of Wearing a Tactical Belt in Daily Life
Transitioning a tactical belt from field conditions to urban wear is a task at the intersection of utility and style. While maximum back relief is the priority on the range, priorities change in the metropolis. Here, the rigid belt must not only securely hold the basic EDC kit but also remain an organic part of your look, without drawing unnecessary attention from others.
A properly chosen belt allows you to maintain a familiar level of readiness and functionality without turning your appearance into an overly aggressive "military cosplay." Let's explore how to adapt this rigid piece of equipment to everyday clothing in a way that is both comfortable and aesthetic.
How to Integrate a Rigid Belt into Civilian Attire with Jeans
Integrating a rigid tactical belt into everyday attire with jeans requires balancing functionality with a civilian appearance. The main problem with classic rigid belts is their excessive thickness and aggressive design.
To make an EDC belt look harmonious with jeans, follow three rules:
- Strap Width. Choose belts with a width of 1.5 inches (about 3.8 cm). This is a standard size that easily fits into the belt loops of most jeans. Models with a 1.75-inch width may snag or deform the fabric.
- Buckle Issue. The popular Cobra quick-release buckle often does not fit through jean loops when assembled. To wear such a belt, remove one part of the buckle, thread the nylon strap through the loops, and then reassemble the lock. An alternative is low-profile metal or plastic frames.
- Appearance. For the city, forgo the external MOLLE interface. A solid-colored nylon strap in black, gray, or olive looks like a regular athletic or casual accessory, without drawing unnecessary attention, while still providing the necessary rigidity for holding a holster and pouches.
Secrets of Concealed Weapon and EDC Accessory Carry
The secret to effective concealed carry (IWB — inside the waistband) lies in the synergy between the belt's rigidity and the correct positioning of the gear. A standard soft belt twists under the weight of a pistol and EDC kit, deforming the silhouette of the clothing and revealing the weapon to others. A rigid tactical EDC belt made of dense nylon strap holds the holster strictly vertical, firmly pressing the grip against the body.
For maximum discretion, use proven techniques:
- Positioning (Appendix vs. 4 o'clock): Carrying the holster at "1 o'clock" (appendix) provides the fastest access and excellent concealment even under a light t-shirt. Classic carry at "4 o'clock" requires looser clothing, such as an untucked shirt.
- Flat Profile Attachments: Choose holsters and pouches with flat plastic or metal clips that minimize the protrusion of the belt externally.
- Counterweight Principle: Place a spare magazine, flashlight, or multi-tool on the opposite side of the holster. This not only balances the weight but also evens out the belt tension, preventing the pants from twisting.
Gear Check in Motion and Basic Maintenance
Even the most expensive and rigid tactical belt, perfectly equipped with pouches and a holster, can fail in a real situation if it hasn't been broken in during movement beforehand. A static fitting in front of a mirror only gives a basic idea of the fit. The true test of ergonomics happens during active movement, bending, and jumping, when dynamic loads are applied to the gear.
Furthermore, the reliability of the entire system directly depends on its technical condition. Dust, sand, sweat, and moisture gradually degrade the nylon webbing and clog the buckle mechanisms, reducing their grip. For your tactical belt to serve for years and not fail at a critical moment, you must regularly perform a dynamic test drive and adhere to basic maintenance rules.
Test Exercises for Checking Belt Fastening Reliability
To ensure that the tactical belt (whether a rigid EDC belt or a two-belt warbelt system) is set up correctly, simply buckling the buckle in front of a mirror is not enough. The gear must remain stable during any maneuvers. Perform this simple set of test exercises:
- Deep Squats and Lunges. Perform 5–7 repetitions. The belt should not dig into your abdomen or slip onto your tailbone. If your trousers pull the belt down, adjust the seating height or webbing tension.
- Jumping Series. Perform 10 intense jumps in place. Heavy gear (holster, pouches) should not slap against your thighs or shift the belt downwards. If you feel looseness, tighten the nylon webbing or check the velcro grip on the inner/outer system.
- Simulated Emergency Draw. Sharply pull a mock weapon from the holster or an empty magazine from a pouch. If the belt twists or lifts with your hand, the belt rigidity is insufficient or the tension is loose.
- Side Bends and Torso Twists. Check whether the Cobra buckle or the rigid frame restricts free breathing and mobility.
If the holster and pouches remain in place during the test, and you do not feel discomfort—the belt is ready for action.
Rules for Cleaning and Maintaining Nylon Webbing and Buckles
Even the strongest nylon webbing and a reliable metal buckle (such as a Cobra type) require regular care to maintain the frame's rigidity and the lock's operational reliability. Dust, sweat, sand, and salt gradually destroy the nylon fibers and clog the mechanism's internal springs.
Cleaning Nylon Webbing:
- Hand Washing: Use warm water (up to 40 °C) and mild soap. Harsh detergents and bleach destroy the polymer structure and reduce the belt's stiffness.
- Dirt Removal: Clean the webbing weave and MOLLE slots with a soft brush.
- Drying: Dry the tactical belt laid flat in the shade. Machine drying and radiators are prohibited—high temperatures deform the plastic rigidity inserts.
Buckle Maintenance:
- Cleaning: Regularly rinse the lock with fresh water to remove sand and salt, then blow dry with compressed air.
- Lubrication: Avoid liquid oils that attract dust. Use dry Teflon (PTFE) lubricant for smooth operation.
Conclusion
A properly chosen and adjusted tactical belt is not just a wardrobe item or a utilitarian accessory; it is the foundation of your safety, mobility, and comfort. Whether you are using a rigid EDC belt for concealed carry in the city or assembling a complex load-bearing belt (warbelt) with an inner/outer system for the range, the basic principles of ergonomics remain unchanged.
To summarize, let's highlight three main rules for effective use of a tactical belt:
- Individual Adjustment: The seating height and the degree of nylon webbing tension must ensure secure fastening without excessive pressure on the lower back.
- Gear Balance: Distribute pouches and holsters evenly, utilizing the MOLLE interface, to avoid leaning and back pain.
- Hardware Reliability: A quality Cobra buckle and regular care of the attachment elements guarantee that the belt will not fail at a critical moment.
Experiment with the configuration dynamically, test the gear during training, and maintain the equipment in a timely manner. Ultimately, the perfect tactical belt is one you completely forget about while performing a task, being absolutely confident in its reliability.